
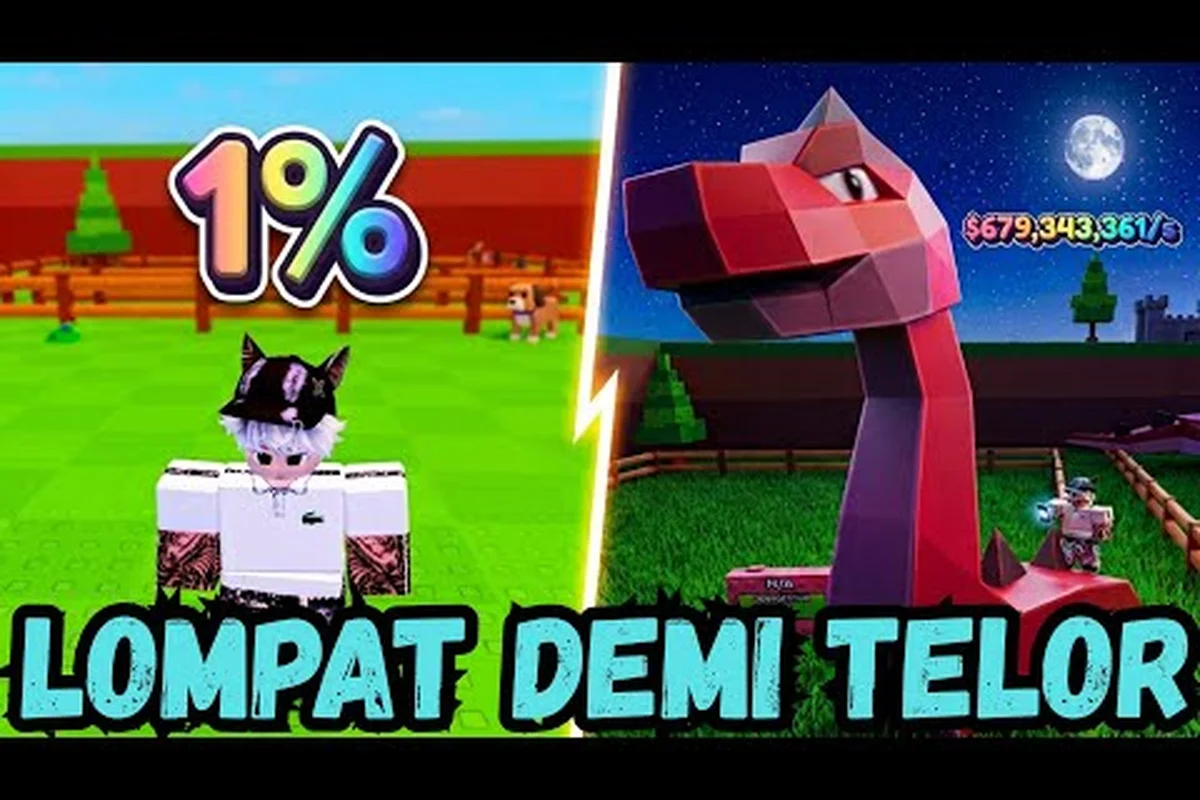
Speed-running Jump for Animals! comes down to three clean phases that build on each other. This Jump for Animals! fastest way to progress guide breaks down what to do from your first jump to your first Mythic egg, so you stop guessing and start training.
The game, published on Roblox by AnimalByte (group id 256494703), is a Simulation/Tycoon where Jump Power gates everything: new worlds, new egg tiers, and new income animals. According to the official Jump for Animals! game page, players train legs at the starting barbell, raise Jump Power, steal guarded eggs, escape back to the plot, and hatch animals that earn money even while offline. The Roblox API lists the title with over 5.3M visits and roughly 10,900 favorites, so the meta has matured fast.
A quick read of the VendoPlus full guide video shows the same loop that experienced players follow: train → jump → steal → hatch → earn. Below, that loop is split into a Jump for Animals! early game guide, a Jump for Animals! mid game guide, and a Jump for Animals! late game guide, with the concrete numbers, upgrades, and egg priorities you need at each step.
The Three-Phase Progression Map at a Glance
Before drilling into details, here is the high-level map. The phases overlap — your Jump Power keeps training in the background even while you are stealing eggs — but the priorities shift as your roster grows, and the Jump Power numbers in the table below (250 → 1,500 → 5,000 → 10,000+) are the real gatekeepers, because each bracket unlocks a new nest tier and a new animal rarity that the previous bracket simply cannot reach, so skipping ahead is not an option.
| Phase | Jump Power Target | Main Goal | Core Action | Key Unlock |
|---|---|---|---|---|
| Early (0–30 min) | 0 → 250 | First hatch | Train legs, steal Common egg | First Common animal, offline income |
| Early-Mid (30–90 min) | 250 → 1,500 | World 2 access | Buy first Barbell tier, steal Rare eggs | Rare drops, basic coil upgrade |
| Mid (90 min – 4 h) | 1,500 → 5,000 | First Divine | Stack coil + trail, target World 3 nests | Divine eggs, plot expansion |
| Late (4 h – 12 h) | 5,000 → 10,000+ | Mythic path | Mythic bracket prep, escape-route mastery | Mythic eggs, Flight-style abilities |
| Endgame (12 h+) | 10,000+ | Index completion | Phoenix/Dragon/Lion runs, reroll for sizes | Mythic roster, Animal Index rewards |
The single biggest mistake new players make is mixing up the priority order: they buy a coil before maxing the first barbell, or they chase a Mythic egg before reaching the Jump Power bracket that actually lets them escape the guardian. The phase order below fixes that.
Jump for Animals! Early Game Guide: The First 30 Minutes
The first half hour is the Jump for Animals! early game guide in its purest form. You spawn, you train, you steal, you hatch, and you stop touching anything that is not on the loop. According to the VendoPlus full guide video, the opening minutes look almost scripted for a reason: every minute spent not training is a minute you are not compounding Jump Power.
Step 1 — Lock the Training Loop
Head to the starting barbell immediately. Do not chase eggs, do not explore the map, and do not buy anything cosmetic. The first ten minutes belong to the barbell, because Jump Power is the only stat that gates every other system in the game. The starting barbell gives a small but consistent multiplier, and your first job is to stack the smallest multipliers the most times.
| Barbell Tier | Approx. Cost | Jump Power Bonus | Best Use Window |
|---|---|---|---|
| Starter | Free | +1× baseline | First 5 minutes |
| Iron | ~500 coins | +15% | Once you have hatched one Common |
| Steel | ~2,500 coins | +30% | After first Rare hatch |
| Chrome | ~12,000 coins | +55% | Mid-game pivot |
| Titanium | ~60,000 coins | +90% | Late-mid prep for World 3 |
Do not buy Iron until your first animal hatches, because every coin you spend on a leg upgrade before your first income source is a coin that delays the loop. The whole point of the Jump for Animals! fastest way to progress plan is that the loop feeds itself: train → earn → upgrade → train faster.
Step 2 — Your First Egg Steal
After about 8–12 minutes of training, your Jump Power will let you reach the lowest Common nest on the starting island. Approach from the side opposite the guardian, grab the egg, and run back to your plot. Do not stop to fight. Common eggs hatch in roughly 60–90 seconds, and even a Common animal starts paying you back the moment it hatches.
The official game description highlights that animals earn money even while you are offline, which is why your first hatch is more important than your first Rare: the offline income multiplier is calculated from your roster, not from rarity alone. A plot with five Common hatchlings outperforms an empty plot with a single locked Mythic.
Step 3 — Spend the First Paycheck Wisely
Once your first animal is producing coins, resist the urge to roll for more eggs. The Jump for Animals! early game guide rule is: spend the first 2,000 coins on the Iron barbell, the next 1,500 on a single speed coil tier, and the rest into the next Common egg. Trail upgrades can wait — they are visual and minor until mid-game.
A practical training table for the first hour maps the fastest way to progress through the Starter zone, breaking the grind into four blocks where Jump Power, hatch timing, and spending checkpoints all align — note how each row intentionally front-loads the Iron barbell before the second Rare egg attempt, since the ~250 Jump Power threshold is the real gatekeeper to expanding your egg inventory on the starting island.
| Time | Action | Jump Power Target | Coins Target |
|---|---|---|---|
| 0–10 min | Train at Starter | ~80 | 0 |
| 10–20 min | First Common steal + hatch | ~180 | ~800 |
| 20–30 min | Iron barbell + 1 more egg | ~250 | ~2,000 |
| 30–60 min | Second egg, second hatch, first coil | ~450 | ~5,000 |
The key number is the ~250 Jump Power mark, because that is the soft gate to the second nest cluster on the starting island and the first real Rare egg opportunity. Pushing to 250 should take roughly 25–30 minutes if you stay on the barbell and avoid distractions.
Jump for Animals! Mid Game Guide: From World 2 to First Divine
The mid game is where the Jump for Animals! fastest way to progress plan starts paying compounding interest. By this point you have at least three hatched animals, a couple of Rare drops, and a working barbell stack. The Jump for Animals! mid game guide focuses on three things in order: coil stacking, World 2 access, and the first Divine egg. By this point you have at least three hatched animals, a couple of Rare drops, and a working barbell stack. The Jump for Animals! mid game guide focuses on three things in order: coil stacking, World 2 access, and the first Divine egg, and if you need a broader primer on the basics before tackling that progression curve, the Jump For Animals Game Guide walks through pet rolls, rebirth timing, and how to set up a reliable bench so your mid-game stack actually pays off.
Stacking Jump Power With Coils and Trails
Speed coils and trails are the second multiplier layer on top of barbells. Coils affect horizontal travel speed (which determines how reliably you escape guardians), while trails affect jump height and visual flair. Both stack multiplicatively with barbell tiers, so the order matters: barbell first, then coil, then trail, then the next barbell.
| Upgrade Track | Cheapest Useful Tier | Mid-Game Tier | Late-Game Tier |
|---|---|---|---|
| Barbell | Iron | Chrome | Titanium+ |
| Speed Coil | Tier 1 | Tier 3 | Tier 5+ |
| Trail | Basic | Ember | Mythic-class |
| Plot Slot | 4 animals | 8 animals | 12+ animals |
Community testing shared across YouTube showcases (see the Volc money showcase) suggests the coil stack starts paying for itself at Tier 3, because that is the tier that turns most Rare-steal escapes from coin-flips into reliable wins. If you are losing more than one in five eggs on the way home, your coil is the problem, not your Jump Power.
World 2 Gate and the First Real Egg Tier
World 2 unlocks at roughly 1,500 Jump Power and immediately opens two things: the Steel-tier barbell and the first Rare-heavy nest cluster. The mid game is also where players encounter Divine eggs for the first time, but chasing a Divine before hitting 3,000 Jump Power is a common trap.
Speed matters here because every coil tier doubles your Jump Power output, so shaving even 20 minutes off the 1,500→3,000 Jump Power corridor compounds across the next two worlds; the route below is the one most players in the Jump for Animals! fastest way to progress community settle on after testing pure nest grinding against coil-first routing.
-
Hit 1,500 Jump Power → unlock World 2 → buy Steel barbell
-
Stack two coil tiers → start farming Rare eggs on a loop
-
Reach 3,000 Jump Power → start the Divine bracket
-
Hit 5,000 Jump Power → unlock World 3 nests
| World | Jump Power Gate | Egg Tier Available | Income Multiplier |
|---|---|---|---|
| World 1 | 0 | Common, Rare | 1× |
| World 2 | 1,500 | Rare, low Divine | ~1.6× |
| World 3 | 5,000 | Divine, low Mythic | ~2.4× |
| World 4+ | 10,000+ | Mythic, secret | ~3.5×+ |
The income multiplier on each world is what makes the Jump for Animals! fastest way to progress plan self-funding. By the time you reach World 3, your income from Rare and Divine animals alone should be funding every coil and trail upgrade without manual grinding, which is the real definition of mid-game completion.
Jump for Animals! Late Game Guide: Mythic Path and Animal Index
The Jump for Animals! late game guide is less about grinding and more about choosing the right Mythic target. The barbell is maxed or near max, your coil stack is solid, and your plot is full. The remaining question is which Mythic to chase first and how to prep the bracket that lets you steal it.
Reading the Mythic Bracket
Mythic eggs are gated by a hidden bracket system that is not Jump Power alone. The bracket takes into account your total animals hatched, your Animal Index completion percentage, and your current Jump Power. The fastest Mythic hunters, based on community playthroughs referenced in the VendoPlus full guide video, tend to push their Index to at least 25% before attempting a Mythic steal, because the bracket reward thresholds scale with Index progress.
| Prep Step | Target Before Mythic | Why It Matters |
|---|---|---|
| Animal Index % | 25%+ | Unlocks Mythic bracket reward |
| Plot Slots | 10+ | Holds more income during reroll |
| Barbell | Chrome or higher | Survives longer against Mythic guardians |
| Coil | Tier 4+ | Outruns the faster Mythic patrols |
| Total hatched | 30+ animals | Bracket scaling factor |
Mythic Targets Worth Chasing First
Not all Mythics are equal in the late game, and choosing the wrong one can stall your Jump Power climb for days. The Fire Phoenix, Dragon, and Lion are the three most-referenced Mythics in community tier discussions because each unlocks a distinct endgame loop: Phoenix gates the flight ability and Index completion behind a Jump Power check, Dragon feeds raw income and plot expansion through Ground Giant farming, and Lion is a mid-tier anchor that boosts Jump Power directly with lower steal risk. The table below compares these trade-offs so you can sequence your steals around the progression path you actually need, rather than chasing whichever Mythic is trending.
| Mythic | Best For | Steal Difficulty | Long-Term Value |
|---|---|---|---|
| Fire Phoenix | Flight ability, Index completion | High (Phoenix Nest) | Top-tier |
| Dragon | Raw income, plot expansion | Medium (Ground Giant) | High |
| Lion | Jump Power boost, mid-tier anchor | Low-Medium | Solid pivot |
According to the Roblox Games API listing, the game was last updated 2026-09-03, and Mythic mechanics are tuned in active patches. Players chasing the Fire Phoenix should plan for the highest Jump Power requirement in the current build, while the Lion is a safer first Mythic for players who are still filling their Index.
Animal Index as the Late-Game Compass
The Animal Index is the only progression system that does not reset on a new patch, which makes it the most reliable long-term goal in the Jump for Animals! fastest way to progress plan. Every new hatch contributes, and rare-size hatches contribute more. The Index rewards track is also where the highest-value cosmetics and permanent multipliers live.
A practical Index plan inside the Jump for Animals! fastest way to progress playbook starts by opening the Animal Index menu, sorting all hatches by size band, and checking your current percentage against the reward table so you know exactly which tier unlocks next; most players stall between 10% and 25% because they skip the Common–Uncommon bands and chase Rare hatches too early, wasting Coil vouchers on eggs that would otherwise count toward base completion. Work the bands in order — Common, Uncommon, Rare, Mythic, Phoenix — and only start fusing Mythic prep once 25% is secure.
| Index % | Reward Tier | Action |
|---|---|---|
| 0–10% | Basic coins, Common animals | Keep hatching, do not chase |
| 10–25% | Coil voucher, first Rare ticket | Start Rare farm loop |
| 25–50% | Mythic bracket access | Begin Mythic prep |
| 50–75% | Trail upgrades, plot expansion | Stack mid-game Mythics |
| 75–100% | Phoenix-tier access, secret eggs | Endgame content unlocked |
Filling one slot of every size band before chasing the next tier is the single most efficient Animal Index move in any jump for animals fastest way to progress route, because the Index scores each size tier as a separate completion bucket — owning a Common rabbit, an Uncommon fox, a Rare wolf, a Mythic dragon, and a Phoenix phoenix simultaneously counts as 5/5 tiers, while five duplicate Rare wolves still register as 1/5. Concretely, a player who clears Common → Uncommon → Rare → Mythic → Phoenix in that exact ladder order will already sit near the 10% reward threshold shown in the table above after roughly 12–15 hatches, whereas a player who fuses five Rare wolves first may show 3–4% with the same egg spend because the Index weights breadth far more heavily than depth until a band is fully capped.
Cross-Phase Optimizations and Common Traps
A few habits separate a fast progress run from a stalled one, and most of them live in the transition windows between phases rather than the phases themselves. None are complicated, but they are easy to skip when you are excited about a new egg drop — for example, players who jump straight from a Tier 3 incubator into Tier 4 enclosures without first capping affinity meters or stockpiling the second-tier feed buffers almost always hit a 20-30 minute stall, while those who bank 15-20% over the soft threshold for each stage keep the momentum curve from dipping back into mid-game grind territory.
Three Daily Habits That Compound Progress
-
Reinvest the first 30 minutes of offline income into the next barbell tier, not into cosmetics. Offline income resets the moment you log back in, but the barbell you buy with it compounds every future training session.
-
Pick one Mythic target and stick with it for at least two full steal attempts. Switching targets between Phoenix, Dragon, and Lion burns your Mythic bracket cooldown without a successful hatch.
-
Track your Index percentage weekly, not daily. Daily Index tracking leads to rerolling for tiny gains; weekly tracking keeps you focused on the next bracket reward.
Three Traps That Stall Progress
-
Buying the Titanium barbell before maxing the Chrome tier. The cost jump from Chrome to Titanium is so steep that you usually lose more idle income than you gain in Jump Power, unless you already have 6+ hatched animals.
-
Chasing a Divine egg before hitting 3,000 Jump Power. Divine guardians outrun a low coil stack, and you will lose the egg on the way home more often than not.
-
Selling hatched animals for quick cash. Animals are the income engine, and selling one for a short-term boost usually costs more in long-term compounding than it returns.
A good rule of thumb: if the action does not push your Jump Power, your coil tier, your plot slots, or your Index percentage, it is decoration, not progression. In practice this means ignoring upgrades that only shave a few seconds off your cooldowns or buying cosmetic buildings before your Chrome coil is fully stacked, because every credit spent on a non-scaling stat is a credit pulled from the compounding loop of Jump Power → higher tier → more plot income → faster hatching. Before each purchase, mentally map it to one of the four progression axes; if the line item does not move a number on that list, skip it and bank the currency for the next coil threshold.
Choosing the Right Build for Your Playstyle
The fastest route is rarely the most fun route, so it pays to match your build to how you actually play rather than chasing whatever tops the leaderboard this patch. For example, an Income Farmer who buys a Lion Mythic instead of the Dragon Mythic first will hit a wall around the Animal Index 60% gate, while an Index Hunter who skips the Fire Phoenix for early mobility will stall in mid-game Jump Power scaling. Check the table below and commit to the Mythic that aligns with the resource you actually enjoy farming, not the one a tier list tells you to grind.
| Build Style | Focus | Key Stat | First Target |
|---|---|---|---|
| Income Farmer | Passive coins | Offline multiplier, plot size | Dragon Mythic |
| Index Hunter | Animal Index % | Rare-size hatches | Lion Mythic |
| Ability Seeker | Flight, mobility | Jump Power, trail upgrades | Fire Phoenix |
Each build follows the same early- and mid-game phase order; the difference is which Mythic you commit to first. If you are a casual player who logs in twice a day, the Income Farmer build is the most forgiving. If you are a completionist, the Index Hunter build pays off the highest. If you are the kind of player who wants the flashiest unlock first, the Ability Seeker build gets you to the Phoenix the fastest.
Frequently Asked Questions
What is the Jump for Animals! fastest way to progress in the first hour?
Lock the barbell loop for the first 10 minutes, steal your first Common egg, hatch it, then buy the Iron barbell with the first paycheck. The priority order is barbell → coil → trail, and you should hit roughly 250 Jump Power inside 30 minutes. According to community data, this opening sequence outperforms exploration-first routes by about 20 minutes of effective progression.
When should I switch from the Jump for Animals! early game guide to the mid game plan?
Switch when you have at least three hatched animals, a full Iron barbell, and roughly 1,500 Jump Power. That combination is the soft gate to World 2, which is where Rare eggs start dropping at a useful rate. Do not switch earlier, because the mid-game coil stack only pays off once your income is already running.
Which Mythic should I target first in the late game?
For most players, the Lion is the safest first Mythic because its guardian is the slowest of the three top targets. If you already have a Tier 4+ coil and a Chrome barbell, the Dragon is a better first target because of its higher income output. The Fire Phoenix should always be the last Mythic of the three you attempt, because it requires the highest Jump Power and the most plot prep.
Do I need to play every day to keep progressing?
No. The offline income multiplier means your roster keeps paying you while you are away, and the barbell tiers you have already bought remain active. Most community-tested progress plans assume two sessions per day, with offline income covering the barbell and coil upgrades that the next session spends on. Daily play is an option, not a requirement.
What is the best use of coins in the Jump for Animals! fastest way to progress plan?
The first 2,000 coins go to the Iron barbell, the next 1,500 to a single speed coil tier, and the next 3,000 to the Steel barbell. Cosmetics and trail visual upgrades can wait until you have at least one Mythic hatched, because they do not compound into Jump Power or income. Treat every coin spent before your first Rare as a coin that delays the loop.