
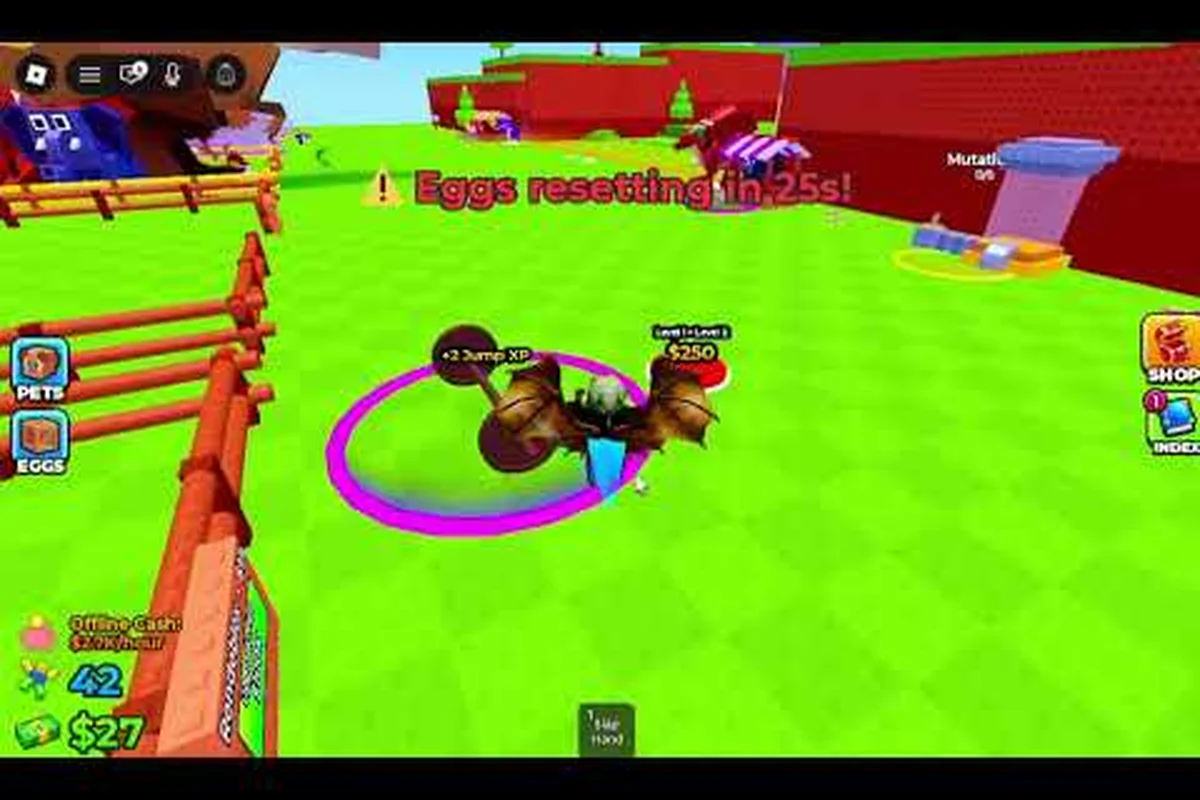
Getting started in Jump for Animals! on Roblox feels weird the first time you load in: you spawn on a tiny plot, your character can barely hop, and a giant animal the size of a building is guarding the only egg you can see. That gap between "weak starter" and "rich tycoon" is exactly what this Jump for Animals! how to play on Roblox walkthrough is built to close, so your first 30 minutes end with a hatched animal, real income ticking up, and a clear plan for the next session.
Jump for Animals! First-Time Setup on Roblox
Before you can train legs, steal eggs, and grow your offline income, the launcher, account, and device all have to be ready. The good news: Jump for Animals! supports Desktop, Console, Mobile, and Tablet, so the setup checklist is short, but skipping steps here is one of the most common Jump for Animals! mistakes to avoid because a bad launch means wasted training time on a session that may not save progress.
Roblox Account, Age, and Privacy Basics
Jump for Animals! is a Simulation/Tycoon experience published on Roblox by the AnimalByte developer group, and it follows Roblox's standard account model. You need a free Roblox account, a display name other players can see, and parental consent if your account is under 13 (Roblox enforces this for chat, voice, and certain social features). Privacy settings matter because Jump for Animals! is a multiplayer server — if voice or chat is locked by parental controls, you will still see the world, jump, and steal eggs, but you cannot coordinate with nearby players, which can be a real problem during contested egg runs.
Before clicking Play, open the Roblox settings menu (gear icon, top-right) and confirm the exact permission scope that Jump for Animals! actually needs: Account Age must satisfy the 13+ chat rule, Chat and Voice toggles must allow coordination with other egg-stealers (without these you can still jump and grab eggs, but you cannot call out incoming stealers or trade Rebirths), and Two-Step Verification must be enabled before any Robux purchase on a Tycoon upgrade — leaving it off is one of the most common jump for animals mistakes to avoid, because stolen or accidentally bought upgrades on a shared device are non-refundable.
-
Account age matches the platform rules for your region.
-
Chat and voice are set to the level you want (some parents keep these off).
-
Two-step verification is on if you plan to spend Robux on upgrades.
Launching the Game and Joining a Server
Once your account is ready, search "Jump for Animals!" in the Roblox catalog or jump straight to the official Jump for Animals! game page and click the green Play button. Roblox will install or update the client automatically on first launch, which can take a few minutes on slower connections. After the client boots, the game teleports you into a public server with up to five players; if a server feels empty or overly crowded, simply leave and re-queue to roll a new instance.
The first server you land in is your "tutorial" environment. Use it. There is no separate training room, so the first five minutes of Jump for Animals! how to play on Roblox happen in a live server with real players and real guards patrolling the map.
Platform-Specific Controls and Performance
Controls differ slightly by device, and matching the right input method to your platform is one of the underrated Jump for Animals! pro tips because it directly affects Jump Power gain speed. On PC/Mac, holding Spacebar through the apex of each bounce tends to register higher combo multipliers than tap-tapping, while mobile players often see faster Egg-grab reaction times when the virtual joystick sensitivity is left at default rather than cranked up — a small but measurable difference that separates casual Jump for Animals! beginners from players climbing the leaderboard in early rounds.
| Platform | Move | Jump | Steal/Egg Action | Camera |
|---|---|---|---|---|
| PC/Mac | WASD or arrow keys | Spacebar | E (interact) | Hold right mouse to rotate |
| Mobile/Tablet | Virtual joystick (left) | Jump button (right) | Action button (right) | Swipe to rotate |
| Console (Xbox/PlayStation) | Left stick | A / Cross | X / Square | Right stick |
| Console (general) | Trigger to sprint where supported | B / Circle to cancel | Y / Triangle menu | — |
For a visual walkthrough of the first 10 minutes, the VendoPlus beginner video on YouTube lines up nicely with this guide and is a solid second reference while you practice — its 0:00–2:30 segment covers the same Spacebar-vs-tap discussion above and shows the default mobile joystick layout from the control table in real matches, so you can confirm your muscle memory matches the video before chasing higher Jump Power combos.
How the Steal-and-Hatch Loop Works on Roblox
Every Jump for Animals! session, regardless of how rich your plot gets, is built from the same five-step loop: train legs, jump to a guarded area, steal an egg, escape back to your plot, and hatch it. This is the spine of any Jump for Animals! complete guide because every system — Jump Power, upgrade trees, rare sizes, the Animal Index — is bolted onto that one loop. Players who internalize the loop early progress roughly twice as fast as players who wander, based on community observations shared in the AnimalByte group's discussion tab.
Step 1 — Train at Your Starting Barbell
Your plot spawns with a free barbell and a small training area. Walk up and press the interact key (E on PC) to start a leg training set. Each rep adds a small amount of Jump Power, the single stat that decides how high you can hop. The trick here is patience: training stacks over many short sessions, and idle XP keeps earning between visits. Players who disconnect mid-rep lose nothing, so leaving your character mid-training is safe.
Think of it as the cheat sheet that sits between the training explanation and the data table — a one-line summary reminding new Roblox players that everything in the table below is the practical pay-off of those early reps at the Starting Barbell, from single rep gains to the permanent multiplier unlocked by your first upgrade purchase.
| Action | Jump Power Gain | Notes |
|---|---|---|
| Single rep | Small | Always available |
| Set of 10 | Small + combo bonus | Don't mash the button |
| Idle XP (offline) | Slow trickle | Animals still earn while away |
| First upgrade purchase | Permanent multiplier | One of the best early buys |
Step 2 — Jump to a Guarded Egg Zone
Once your Jump Power is high enough, follow the visual cues toward the giant animals roaming the map. Each giant is a living obstacle guarding an egg nest, and the higher you can jump, the further and higher-tier nests you can reach. Early on, target the low-altitude eggs first — they are easier to steal and let you practice the escape path before chasing Mythic eggs.
Step 3 — Steal, Then Escape Quickly
Stealing the egg is the easy part: walk up, press the interact key, and the egg attaches to your character. The hard part is the escape, because the giant guard wakes up and chases you. The escape rule is simple: do not stop. Run a curved path back toward your plot, use any ramp or trail you have unlocked to gain height, and do not try to fight the guard — you cannot, at least not early on. If the guard catches you, you drop the egg and respawn on your plot, losing the run entirely.
Step 4 — Hatch the Egg on Your Plot
Drop the egg on your plot's hatching pad and start the incubation timer. Timers vary by egg rarity; cheaper eggs hatch in seconds, while rarer eggs take minutes or longer. The community reports that the best use of hatching time is to immediately start another training run, so your Jump Power never stops climbing.
Step 5 — Collect Income and Buy Upgrades
Hatched animals sit on your plot and generate in-game currency passively, even when you log off. Reinvest that money into barbells, trails, and speed coils from the upgrade shop, then chase a harder egg. This is the basic economic engine, and it scales forever, which is why tycoon players describe Jump for Animals! as a "set it and forget it" income loop with active skill ceilings. For a money-focused deep dive, the Volc richest-player showcase shows how aggressive reinvestment looks at high Jump Power levels.
First-Run Strategy and Jump Power Progression
Now that the loop is clear, the question becomes: how do you spend your first 30–60 minutes so that you are not stuck with a single low-tier animal for the rest of the week? The answer is a layered Jump Power progression plan, paired with smart upgrade order and one crucial safety habit: never log out while carrying an egg.
Jump Power Milestones and What They Unlock
Jump Power is the gatekeeper stat, and every tier of Jump Power opens a new tier of guarded eggs, which is why leveling it should outrank cosmetic purchases for any new player working through this Roblox experience. Based on community testing reported by players in the AnimalByte group, crossing the Low threshold (roughly 2 plot lengths) is the first major breakpoint because it unlocks common nests and basic trails that start feeding your egg catalog. Pushing into the Mid and High tiers is where the real payoff happens, since rare eggs and hidden nests carry higher hatch odds for animals you simply cannot reach with a starter barbell loadout, making jump height the single most leverageable upgrade in your early economy.
| Jump Power Tier | Approx. Jump Height | What Becomes Reachable | Recommended Buy |
|---|---|---|---|
| Starter | 1 plot length | Tutorial egg only | First barbell upgrade |
| Low | 2 plot lengths | Common nests, basic trails | Speed coil tier 1 |
| Mid | Mid-height platforms | Uncommon eggs, ramp access | Trail cosmetic + coil tier 2 |
| High | Tall nests visible from spawn | Rare eggs, hidden nests | Barbell elite upgrade |
| Elite | Map's tallest areas | Mythic eggs, secret animals | All upgrades maxed |
Upgrade Priority Order for New Players
Money disappears fast in the first hour if you spend it in the wrong order, and the community-recommended priority list — which mirrors most Jump for Animals! pro tips threads — exists because new players often blow their first 2,000 coins on cosmetic trails before realizing a single Barbell upgrade delivers nearly three times the Jump Power per token spent. The logic is simple: in the early game, vertical reach and traversal speed convert directly into eggs-per-minute, while cosmetics give zero gameplay return, so reordering those first purchases is the single biggest Jump for Animals mistake to avoid during the tutorial-to-mid-game transition.
-
Barbell upgrade — biggest Jump Power per dollar early on.
-
Speed coil — shorter escape routes save more eggs than raw jump height.
-
Trail cosmetic (optional) — purely visual, but useful for marking your plot.
-
Hatching speed upgrade — only after you already have a stable income stream.
-
Plot expansion — last, because the early game fits in the default area.
Common Jump for Animals! Mistakes to Avoid in the First Hour
The most expensive Jump for Animals! mistakes in your first hour are rarely one big error — they are clusters of small decisions that compound against your Jump Power, hatch timer, and egg inventory. A player who wastes ten minutes chasing a Mythic instead of running three safe loops will end the hour with fewer Common eggs, weaker training, and a slower base income than a player who ignored the shiny egg entirely and focused on the consistent Short Path. The pattern repeats across cosmetics spending, skipping training, and logging out mid-escape: each cost is small, but together they push your first-hour egg count from a healthy 20+ down to single digits, which directly delays unlocking the second pen.
-
Logging out mid-escape — your character keeps running but the egg can drop on respawn, and you lose the run.
-
Spending on cosmetics first — trails look great but do not raise Jump Power.
-
Chasing Mythic eggs too early — the guards one-shot you, and you will lose three or four common eggs' worth of time in a single failed attempt.
-
Skipping training — players who treat training as a side activity stay weak; players who treat it as the main activity snowball.
-
Ignoring offline income — your animals earn while you are away, so closing the client is not "losing progress."
A more complete beginner roadmap, including the Short Path loop, the Mountain shortcut gate, the training-reset cadence, and recommended pet loadout for first-hour egg output, is in our Jump for Animals! beginner guide, which complements this mistakes checklist with the positive play patterns that prevent the compound losses described above.
Rare Egg Drops and Their Index Value
After the first hour, the game shifts from "survive and train" to "collect and optimize." Rare eggs, size variants, and the Animal Index are the systems that keep long-term players coming back, and they are also where Jump for Animals! how to play on Roblox starts blending with the tycoon genre's signature collection mechanics.
Egg Rarity Tiers
Eggs come in several rarity tiers — Common, Uncommon, Rare, Mythic, and Secret — and the tier you hatch directly determines both the hatch time and the income multiplier of the resulting animal, creating a classic risk-versus-reward loop where Common eggs pop in seconds for a baseline 1x payout, while Mythic and Secret eggs demand long timers, secret-zone access, or puzzle completion but return 15x or higher multipliers that make the wait worthwhile.
| Rarity | Where to Find | Hatch Time | Income Multiplier |
|---|---|---|---|
| Common | Low-altitude nests | Seconds | 1x |
| Uncommon | Mid-height nests | ~1 minute | 2–3x |
| Rare | High nests, hidden ledges | Several minutes | 5–8x |
| Mythic | Top of map, secret zones | Long timer, special animation | 15x+ |
| Secret | Event-only, puzzle-locked | Variable | Highest in game |
Size Variants and Why They Matter
Every animal has a size variant on top of its rarity, ranging from Tiny to Giant, with Colossal and Mythic-size variants floating around in endgame pools. Size affects both visual presence on your plot and income — a Giant common animal can out-earn a Tiny rare animal, which is one of the most surprising Jump for Animals! pro tips for new players. The size you see on the egg is a hint, not a guarantee, so do not throw away a "Tiny" rare egg thinking it is worthless.
Completing the Animal Index
The Animal Index is the long-term collection tracker. Each unique species you hatch is logged, and finishing the index unlocks rewards the community describes as "the real endgame." Treat it as a checklist rather than a race: hatch what you can reach, log out, and come back the next day with fresh offline income to fund the next attempt. If you want a deeper look at the Index and rare-size strategies, our Jump for Animals! strategy guide covers pacing and target priorities.
Device Tips, Performance, and Cross-Platform Play
Because Jump for Animals! supports Desktop, Console, Mobile, and Tablet, the "best" way to play depends on what you have. Each platform has its own strengths, and knowing them is the kind of detail that separates a Jump for Animals! complete guide from a generic Roblox tycoon writeup.
Desktop vs. Console vs. Mobile
| Platform | Strengths | Weaknesses | Best Use Case |
|---|---|---|---|
| Desktop (PC/Mac) | Precise mouse aim, keyboard shortcuts, fastest training | Needs a decent GPU for smooth crowd rendering | Competitive egg runs, long sessions |
| Console | Big-screen comfort, controller precision | Slower menu navigation | Casual collection play |
| Mobile/Tablet | Play anywhere, quick training bursts | Smaller UI, harder precise jumps | Offline-income check-ins, short grind |
Performance and Connection Tips
-
Close background apps on mobile before training to keep the framerate stable.
-
Use a wired or strong Wi-Fi connection during contested egg runs; one lag spike can drop your egg.
-
Lower graphics in Roblox settings if you see frame drops near the giant guard patrols.
Frequently Asked Questions
Is Jump for Animals! free to play on Roblox?
Yes. Jump for Animals! is a free-to-play Roblox experience by the AnimalByte group, and every core mechanic — training, stealing, hatching, the Animal Index — is accessible without spending Robux, though optional cosmetic purchases exist for players who want custom trails.
How do I get stronger legs faster in Jump for Animals!?
Combine barbell upgrades with steady training sets rather than mashing the interact button. Players who complete full sets, then take a short break for idle XP, report the smoothest Jump Power curves, and pairing the barbell with an early speed coil keeps your escape routes short enough to actually bank the eggs you steal.
What should I do if a giant guard catches me and drops my egg?
Respawn on your plot, restart training to rebuild a small Jump Power buffer, and target a lower-altitude egg first. Chasing the same Mythic nest immediately is one of the most common Jump for Animals! mistakes to avoid, because the guard's patrol pattern has not changed and you will likely lose a second egg the same way.
Can I play Jump for Animals! with friends on the same server?
Yes — up to five players share a public server, and you can coordinate jumps, share escape routes, and warn each other about guard patrols. For a smoother team experience, the Jump for Animals! quick-start guide covers the small party-friendly habits that make co-op egg runs much safer.
Do my animals still earn money when I am offline?
Yes. Hatched animals generate passive income 24/7, which is why closing the client after a strong session is a feature, not a setback. Logging in to a stack of uncollected currency and immediately reinvesting it into a barbell or speed coil upgrade is one of the simplest Jump for Animals! pro tips for steady progression.